 +86 152 6060 5085
 +86 152 6060 5085
Blog
Catalog
Latest Blog
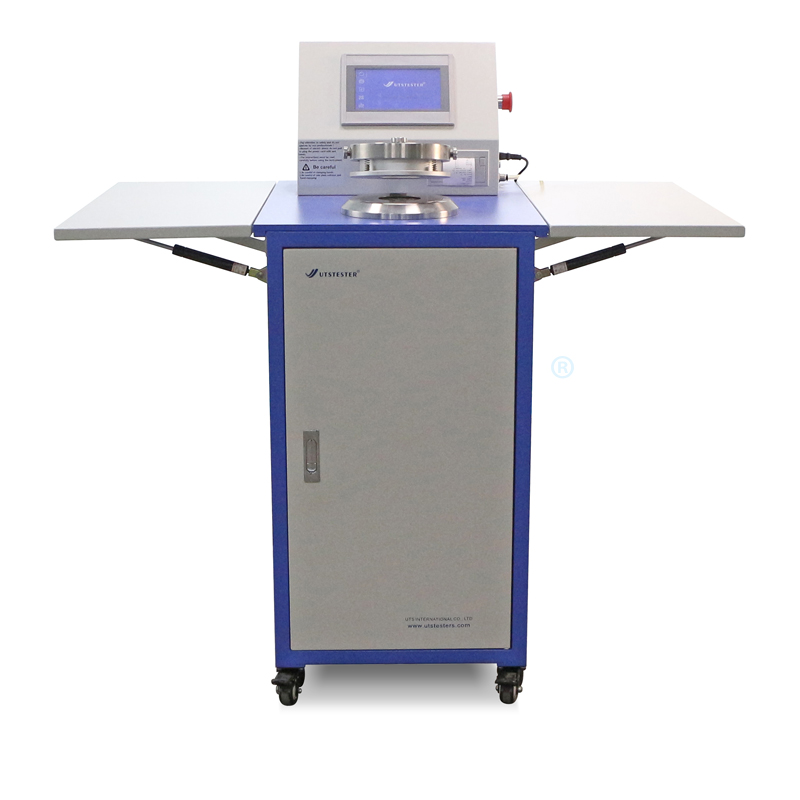
The fabric air permeability meter is used to test the air permeability of materials such as non-woven fabrics, melt-blown fabrics, special industrial fabrics, general fabrics, sponges, knitted fabrics, coated fabrics, non-woven fabrics, and industrial filter paper. Applicable standards: GB/T5453, ISO9237, AFNORG07-111, ASTM737, BS5636, JISL1096-A, DIN53887
Test principle:
According to the prescribed method and test parameters, clamp the sample to the air inlet of the fabric air permeability meter, and then adjust the fan speed so that the pressure difference on both sides of the fabric reaches the prescribed pressure difference. Determine the air permeability of the fabric based on the nozzle aperture and the pressure difference on both sides. Rate, air permeability refers to the amount of air flowing vertically through unit area of the fabric per unit time under a specified pressure difference on both sides of the fabric, unit (mm/s), and the air permeability of the fabric when there is a pressure difference on both sides performance, known as breathability.
The main parameters:
1. Pressure range: 1~4000Pa;
2. Measurable air permeability: 1~40000mm/s;
3. Measurement error: <±2%;
4. Measurable fabric thickness: customized according to samples;
5. Air suction volume adjustment: dynamic adjustment through data feedback;
6. Sample area setting circle: sponge clamp;
7. Clamp size: 100mm*100mm.
How to operate:
1. Prepare the sample as required and cut it into the specified size.
2. Check and calibrate the instrument.
3. Turn on the power switch, enter the control panel interface to set the test parameters, and enter the test preparation interface after setting.
4. Install the sample, put the sample into the testing area, and clamp it on the sample round table. The test position should avoid the edges and wrinkles of the fabric. When clamping the sample, use a certain tension to make the sample flat without deformation. . To prevent air leakage, a gasket can be placed on the low-pressure side of the specimen.
5. Press the start button to start automatic testing. The suction fan is started to allow air to pass through the sample. When the pressure drop gradually approaches the specified value, the air flow rate can be automatically recorded.
6. After the test is completed, press the test head to press the plate to release the clamped sample. Place the next test position of the sample into the detection area, press the test head pressure plate to clamp the sample, press the start button, and start testing again.
7. Repeat the above operations until a set of samples is completed. Under the same conditions, repeat the test on different parts of the same sample at least 5 times.
8. After the test is completed, you can query through the test panel. You can query and browse each test result in turn, and display the test average. If there is air leakage from the fixture, the amount of air leakage can be measured and the value removed from the data.
Press the test platen and release the holder to avoid fatigue. Turn off the power of the instrument, unplug the power plug, and cover the instrument with a dust cover.

Email: hello@utstesters.com
Direct: + 86 152 6060 5085
Tel: +86-596-7686689
Web: www.utstesters.com